LED Wall Setup Guide for Small Studios
Small studios face unique challenges when implementing LED wall technology for virtual production. The high costs and technical complexity that once made LED displays exclusive to major Hollywood productions are now becoming accessible to independent creators and boutique studios. This complete guide walks you through every aspect of LED wall setup, from initial planning to final calibration, helping you create professional-grade virtual production capabilities within budget constraints.
LED wall technology has transformed how content creators approach filmmaking, advertising, and live events. Small studios can now compete with larger production houses by leveraging the same immersive technology that powers blockbuster films and high-end commercials. The key lies in understanding the specific requirements, limitations, and optimization techniques that make LED screen installation feasible for smaller spaces and budgets.
Understanding LED Wall Technology for Small Studio Applications
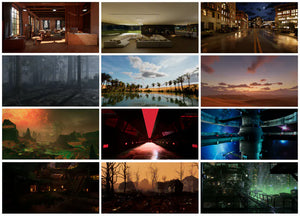
LED walls consist of modular panels that connect together to form large, seamless displays capable of showing high-resolution imagery and video content. Unlike traditional green screens, LED displays provide real-time backgrounds that create natural lighting and reflections on subjects, eliminating the need for extensive post-production compositing work.
For small studios, LED wall systems offer several advantages over conventional filming methods. The technology enables real-time visualization of sets and backgrounds, allowing directors and cinematographers to see the final result during filming rather than waiting for post-production. This immediate feedback loop significantly reduces production time and costs while improving creative decision-making.
The core components of an LED wall system include the LED panels themselves, processing units, mounting hardware, and control software. Modern LED panels feature pixel pitches ranging from 0.9mm to 2.5mm, with smaller pitches providing higher resolution but at increased cost. Small studios typically benefit from 1.5mm to 2.0mm pixel pitch panels, which offer excellent image quality while maintaining reasonable pricing.
Processing units handle the complex task of distributing video signals across multiple panels while maintaining perfect synchronization. These systems must manage color correction, brightness adjustment, and geometric calibration to ensure uniform appearance across the entire display surface. For small studio applications, choosing processors with intuitive software interfaces becomes crucial for efficient operation.
Planning Your LED Wall Installation: Space, Budget, and Technical Requirements
Successful LED wall setup begins with careful planning that considers your studio's physical constraints, budget limitations, and production requirements. Small studios must balance performance expectations with financial realities, making strategic decisions about panel selection, configuration, and supporting infrastructure.
Space Requirements and Configuration Options
LED wall installations require adequate space for both the display panels and the necessary clearance for cameras, lighting equipment, and talent movement. The minimum distance between the LED wall and subjects depends on the panel's pixel pitch and the desired camera angles. Generally, subjects should be positioned at least 8-12 feet from the LED surface to avoid moiré patterns and ensure proper focus separation.
Small studios often benefit from L-shaped or corner configurations that maximize the immersive effect while fitting within limited floor space. These configurations typically use 10-20 panels arranged in a 90-degree angle, creating convincing backgrounds for medium shots and close-ups. Straight wall configurations work well for interview setups, product photography, and situations where talent movement is minimal.
Ceiling height plays a critical role in determining panel arrangement and lighting setup. Most small studio LED walls require minimum ceiling heights of 10-12 feet to accommodate proper lighting angles and avoid unwanted shadows on the LED surface. Studios with lower ceilings may need to adjust their lighting approach or consider alternative mounting solutions.
Budget Planning and Cost Optimization
LED wall costs vary significantly based on panel quality, resolution, and configuration size. Small studios should expect initial investments ranging from $50,000 to $150,000 for basic setups, including panels, processing equipment, and installation. However, the long-term savings in production time and post-production costs often justify this investment within 12-18 months of regular use.
Leasing options provide alternative pathways for studios with limited upfront capital. Many LED manufacturers and distributors offer flexible leasing programs that spread costs over 2-4 years while including maintenance and support services. This approach allows small studios to access professional-grade equipment without massive initial investments.
Used LED panels present another cost-saving opportunity, particularly for studios starting with smaller configurations. High-quality used panels from reputable manufacturers often perform comparably to new equipment at 40-60% of the original cost. However, buyers should verify panel condition, remaining lifespan, and warranty coverage before purchase.

LED Screen Installation Process: Step-by-Step Implementation
The physical installation of LED wall systems requires careful coordination between electrical work, structural mounting, and technical configuration. Small studios often handle portions of this process internally while outsourcing specialized tasks to qualified technicians.
Electrical Infrastructure and Power Requirements
LED walls consume significant electrical power, typically requiring 100-300 watts per panel depending on size and brightness settings. A typical small studio configuration with 15-20 panels may draw 3,000-6,000 watts at full brightness. This power demand necessitates dedicated electrical circuits and potentially upgraded service panels to handle the load safely.
Power distribution should include both primary and backup circuits to prevent complete system failure during critical shoots. Individual panel power connections must be secure and properly rated for the electrical load. Many installations benefit from central power distribution units that provide consistent voltage regulation and circuit protection across all panels.
Cooling considerations become important as LED panels generate heat during operation. Small studios may need to upgrade ventilation systems or install supplementary cooling to maintain optimal operating temperatures. Proper airflow prevents thermal damage and ensures consistent color reproduction across all panels.
Mounting Systems and Structural Support
LED panels require rigid mounting systems that maintain precise alignment while supporting substantial weight. A typical LED panel weighs 15-25 pounds, making a 20-panel installation weigh 300-500 pounds total. This weight requires proper structural analysis and potentially reinforced mounting points.
Ground-support systems offer flexibility and easier reconfiguration compared to permanent wall mounts. These systems use adjustable frameworks that can accommodate different panel arrangements and allow for future expansion. However, ground-support systems consume valuable floor space and may limit camera positioning options.
Wall-mounted systems provide maximum floor space utilization but require careful structural analysis to ensure adequate support. Mounting points must distribute weight evenly across multiple wall studs or structural elements. Professional installation becomes advisable for permanent wall-mounted configurations to ensure safety and longevity.
Signal Distribution and Control Systems
LED wall control requires sophisticated signal distribution networks that handle high-bandwidth video signals across multiple panels. Modern systems use fiber optic connections for long-distance signal transmission with minimal latency and interference. Copper-based systems work adequately for smaller installations with shorter cable runs.
The control computer must possess sufficient processing power to handle real-time video output at the LED wall's native resolution. Most small studio installations require dedicated graphics cards capable of driving 4K or higher resolutions at 60fps refresh rates. Gaming-grade graphics cards often provide excellent performance for LED wall applications at reasonable costs.
Network infrastructure enables remote control and monitoring of LED wall systems. Ethernet connections allow operators to adjust settings, monitor panel status, and troubleshoot issues from central control locations. This networking capability becomes valuable for studios with multiple LED installations or remote production capabilities.
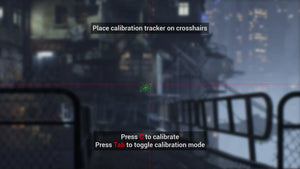
Studio LED Configuration: Calibration and Optimization Techniques
Proper calibration ensures uniform color reproduction, brightness levels, and geometric alignment across all LED panels. This process requires specialized measurement equipment and software tools, but the results dramatically impact the final image quality and professional appearance of productions.
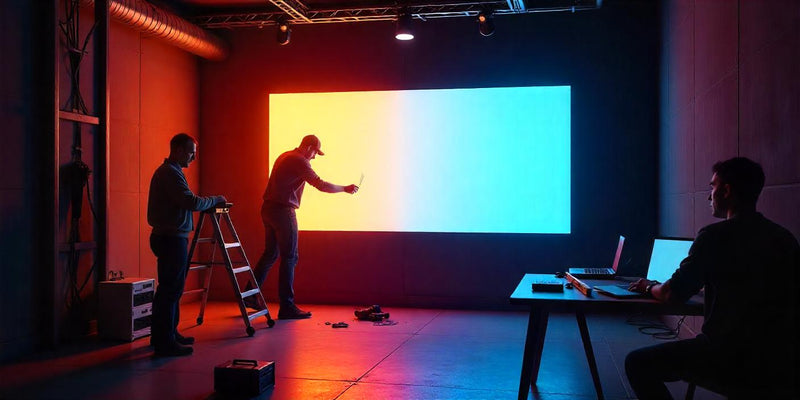
Color Calibration and Uniformity
LED panels from the same manufacturer batch can exhibit slight variations in color temperature, brightness, and color gamut. Professional calibration uses colorimeters and spectrophotometers to measure these variations and apply correction factors that achieve uniform appearance across the entire display surface.
Color temperature matching becomes particularly important when LED walls interact with traditional lighting equipment. Most broadcast and film applications target 5600K or 3200K color temperatures to match standard lighting instruments. Proper calibration ensures that LED background colors appear natural and consistent with foreground lighting.
Brightness uniformity prevents visible seams or patches that can appear distracting in final footage. Calibration software can adjust individual panel brightness levels to compensate for manufacturing variations and aging effects. Regular recalibration maintains optimal performance as panels age and environmental conditions change.
Geometric Alignment and Edge Blending
Perfect geometric alignment ensures that images appear seamless across panel boundaries. This process involves precisely adjusting each panel's position and orientation while using software tools to fine-tune pixel mapping and edge alignment. Small misalignments become highly visible during camera movement or when displaying geometric patterns.
Edge blending techniques soften the transitions between adjacent panels, making panel boundaries less visible even when perfect physical alignment isn't achievable. Software-based edge blending applies graduated transparency masks that overlap pixel regions between panels, creating smooth transitions that are virtually invisible to cameras.
Keystoning and geometric correction compensate for viewing angle distortions and non-perpendicular panel mounting. These corrections become important when LED walls are viewed from extreme angles or when panels are mounted at slight angles due to space constraints. Modern processing systems include sophisticated geometric correction tools that can compensate for complex mounting configurations.

LED Display Mounting Solutions for Compact Spaces
Small studios must optimize their LED wall mounting approaches to maximize functionality while working within space constraints. Creative mounting solutions can provide professional capabilities while maintaining flexibility for other studio uses.
Modular and Reconfigurable Systems
Modular mounting systems allow small studios to reconfigure their LED walls for different production requirements. These systems use standardized connection points and adjustable frameworks that can accommodate various panel arrangements without requiring complete reinstallation. Studios can switch between large background configurations and smaller accent displays as needed.
Rolling cart systems provide ultimate flexibility by allowing LED walls to be moved throughout the studio space or stored when not in use. These systems work well for studios that must serve multiple functions or have limited dedicated space for LED installations. However, rolling systems may sacrifice some stability and precision compared to fixed installations.
Suspended systems hang LED panels from ceiling-mounted tracks or rigging points. This approach maximizes floor space utilization while providing excellent viewing angles for most camera positions. Suspended systems require careful structural analysis and may need professional rigging expertise for safe implementation.
Space-Efficient Configurations
Corner-mounted LED walls maximize the immersive effect while consuming minimal floor space. These L-shaped configurations typically use 12-18 panels arranged in a 90-degree configuration that wraps around one corner of the studio. This setup provides convincing backgrounds for most shot types while leaving the majority of the studio available for other uses.
Curved LED wall configurations create more natural viewing experiences by matching the field of view for specific camera positions. Small studios can achieve curved effects using angled panel mounting or by selecting LED panels designed for curved installations. These configurations require more complex mounting systems but provide superior immersion for certain applications.
Partial height LED walls reduce costs while maintaining functionality for many production types. These configurations typically extend 6-8 feet high rather than full ceiling height, making them suitable for seated interviews, product photography, and medium shots while requiring fewer panels and simpler mounting systems.
Virtual Production Setup: Integration with Cameras and Lighting
LED walls reach their full potential when properly integrated with camera systems and lighting equipment. This integration requires careful planning of camera positions, lighting angles, and LED wall content to create convincing virtual environments.
Camera Positioning and Lens Selection
Camera placement relative to LED walls affects both the immersive quality and technical performance of virtual production setups. Cameras positioned too close to LED surfaces may capture individual pixels or create moiré patterns, while cameras positioned too far away may not benefit from the LED wall's lighting contributions.
The optimal camera-to-LED distance depends on the panel's pixel pitch and the desired shot framing. For 1.5mm pixel pitch panels, cameras should maintain minimum distances of 8-10 feet for wide shots and 12-15 feet for extreme close-ups. These distances ensure that individual pixels remain below the camera's resolution threshold while maintaining natural lighting interactions.
Lens selection impacts both the technical and creative aspects of LED wall integration. Wider lenses capture more of the LED wall surface, creating more immersive backgrounds but potentially revealing panel edges or mounting hardware. Longer focal length lenses provide more selective framing but may not capture sufficient LED wall area to create convincing virtual environments.
Lighting Design for LED Wall Integration
LED walls contribute significant illumination to studio environments, affecting both subject lighting and overall scene balance. Traditional lighting techniques require modification to work effectively with LED background displays, particularly regarding color temperature matching and intensity balancing.
Key lighting must complement rather than compete with LED wall illumination. LED walls provide natural fill lighting and background illumination, often reducing the need for traditional background lighting instruments. However, key lights may need adjustment to prevent over-illumination of subjects or unwanted shadows on the LED surface.
Color temperature consistency between LED walls and traditional lighting becomes critical for natural-looking results. LED walls can adjust their color temperature to match conventional lighting instruments, but this coordination requires careful planning and calibration. Mixed color temperatures create unnatural-looking footage that requires extensive post-production correction.
Practical lighting elements within LED wall content must align with studio lighting to maintain realism. If the LED wall displays a scene with windows showing daylight, the studio lighting should reinforce this motivated lighting direction. This coordination between virtual and physical lighting elements creates convincing integrated environments.
Troubleshooting Common LED Wall Issues
LED wall systems can experience various technical issues that affect performance and image quality. Understanding common problems and their solutions helps small studios maintain optimal system performance and minimize downtime during critical productions.
Signal and Connectivity Problems
Signal loss or degradation often manifests as flickering panels, color shifts, or complete panel blackouts. These issues typically result from loose connections, cable damage, or processing system overload. Systematic checking of all connections and cable integrity usually identifies the source of signal problems.
Processing system overload occurs when the control computer cannot handle the data requirements of the LED wall configuration. This situation causes dropped frames, delayed response, or system crashes during operation. Upgrading graphics cards, increasing system memory, or optimizing software settings often resolves these performance issues.
Network connectivity problems affect remote control and monitoring capabilities. LED wall systems rely on stable network connections for configuration changes, status monitoring, and content updates. Network troubleshooting follows standard IT practices, including checking physical connections, IP address conflicts, and firewall settings.
Panel Performance and Calibration Issues
Individual panel failures can create dark spots, color shifts, or brightness variations across the LED wall surface. These problems may result from component failures, power issues, or environmental factors. Panel replacement or repair typically requires manufacturer support or qualified service technicians.
Color drift over time causes panels to shift away from their calibrated color points, creating visible variations across the LED wall. Environmental factors, panel aging, and thermal cycling contribute to color drift. Regular recalibration maintains color consistency and extends system performance life.
Brightness variations between panels create visible seams or patches that distract from content quality. These variations may result from manufacturing tolerances, uneven aging, or power supply inconsistencies. Professional calibration equipment can measure and correct brightness variations through software adjustment.
Environmental and Power Considerations
Temperature-related problems affect LED panel performance and longevity. Excessive heat causes color shifts, brightness reduction, and accelerated aging. Inadequate cooling or poor ventilation commonly causes temperature issues in small studio installations. Improving airflow or adding supplementary cooling systems typically resolves these problems.
Power supply issues can cause various performance problems, including brightness instability, color shifts, or complete system failures. Power problems often result from inadequate electrical infrastructure, poor connections, or power supply component failures. Professional electrical evaluation may be necessary to identify and resolve power-related issues.
Humidity control prevents condensation and corrosion that can damage LED panel electronics. Small studios in humid climates may need dehumidification systems to maintain optimal operating conditions. Environmental monitoring systems can provide early warning of conditions that might affect LED wall performance.
Conclusion
LED wall setup for small studios represents a significant technical and financial undertaking that can transform production capabilities when implemented correctly. The key to success lies in thorough planning, realistic budget allocation, and careful attention to technical details throughout the installation process.
Small studios that invest in LED wall technology gain access to production techniques previously available only to major studios. The ability to create immersive virtual environments, reduce post-production requirements, and provide real-time visual feedback revolutionizes the creative process while often reducing overall production costs.
Success with LED wall installations requires ongoing maintenance, regular calibration, and continuous learning about evolving technologies and techniques. Studios that commit to proper system care and operator training will realize the full benefits of their LED wall investment while maintaining competitive advantages in an increasingly demanding market.
The future of LED wall technology continues to evolve with improved panel resolution, reduced costs, and enhanced software capabilities. Small studios that establish LED wall capabilities today position themselves to take advantage of these ongoing improvements while building expertise that will serve them throughout their technology lifecycle.
Frequently Asked Questions
Q: What is the minimum space requirement for a small studio LED wall setup?
A: The minimum space for an effective LED wall setup is approximately 20x15 feet with 12-foot ceilings. This allows for a 12-panel configuration with adequate camera positioning distance and proper lighting clearance. Smaller spaces can work with reduced panel counts or alternative configurations.
Q: How much does a basic LED wall setup cost for a small studio?
A: Basic LED wall installations for small studios typically range from $50,000 to $150,000, including panels, processing equipment, mounting hardware, and installation. Costs vary significantly based on panel quality, configuration size, and local installation rates. Leasing options can reduce upfront costs to $2,000-5,000 monthly.
Q: Can I install LED wall panels myself, or do I need professional installation?
A: While technically capable individuals can handle basic LED wall assembly, professional installation is recommended for electrical work, structural mounting, and system calibration. DIY installation may save costs but risks safety issues and suboptimal performance. Professional installation typically includes warranty coverage and ongoing support.
Q: What pixel pitch should I choose for my small studio LED wall?
A: For small studio applications, 1.5mm to 2.0mm pixel pitch provides optimal balance between image quality and cost. Smaller pixel pitches offer higher resolution but at significantly increased expense. Larger pixel pitches reduce costs but may show visible pixels at typical camera distances.
Q: How do I maintain consistent color across all LED panels?
A: Color consistency requires initial professional calibration using colorimeters and specialized software. Regular recalibration every 6-12 months maintains color accuracy as panels age. Environmental factors like temperature and humidity should be controlled to minimize color drift between calibrations.
Q: What computer specifications do I need to drive an LED wall system?
A: LED wall control requires powerful graphics cards capable of 4K+ output at 60fps, minimum 32GB RAM, and high-speed storage. Professional graphics cards like NVIDIA Quadro or AMD FirePro provide optimal performance, though high-end gaming cards can work for smaller installations. CPU requirements vary based on content complexity and real-time processing needs.
Q: How do LED walls affect traditional studio lighting setups?
A: LED walls provide significant fill lighting and natural background illumination, often reducing traditional lighting requirements. Key lights may need adjustment to prevent over-illumination, and color temperature matching becomes critical. Many studios reduce their traditional lighting inventory by 30-50% after LED wall installation.
Q: What ongoing maintenance do LED walls require?
A: Regular maintenance includes cleaning panel surfaces, checking connections, monitoring panel performance, and recalibrating color settings. Professional service should be scheduled annually for deep cleaning, component inspection, and performance optimization. Proper environmental control minimizes maintenance requirements and extends panel lifespan.